Snap-off Model Installation
Step 1:
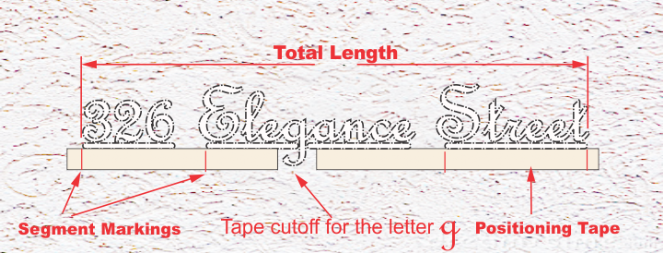
Choose the location and clean the surface using a brush and dish soap water and let it dry. Stick a straight tape as a positioning guide on the back wall and pen mark the sign's starting and ending points as well as the starting points for each address segment on the tape. ( The Sign length and the starting points of each segment are mentioned in the "Sign meaurement sheet" included in the package)
Note: If you have any g, j, p, q or z letters in your sign, a part of positiong guide tape where these letters are located has to be cut off and removed.

Step 2:
Prepare the installation glue with the attached dispensing nozzle and spread a 1/8-1/4" width glue line on the back side of letters and numbers.
DO NOT PUT ANY GLUE ON DETACHABLE UNDERLINE.
GLUE IS BEST IF USED ABOVE 40 ºF (4.4 ºC)

Step 3:
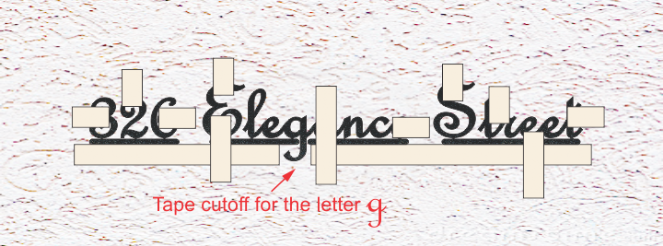
Precut 10-15 pieces of duct tape in 2"-3" length and stick them onto an accessible location. Then attach each glued sign piece in the proper location onto the back wall one by one and push down and hold it for 30 seconds, then secure each piece with precut duct tape pieces then remove and clean up the extra glues.

Step 4:
Wait for 10-12 hours until the glue is semi cured, then cut off and remove the snap-off underline attachment using a sharp side cutter from the cutoff joints and remove all holding and positioning tapes.


